In a previous post, I discussed the process of connecting a external data source (Excel) with a Navisworks model. In this post, we will connect an MS Access database with a Navisworks model. As before, I’ll walk you thru how to setup the database link. For this demo, I am going to use the Gatehouse sample file that ships with Navisworks 2016. You can find the files C:Program FilesAutodeskNavisworks Manage 2014SamplesGatehouse
The Process
In order to connect an Access database to a Navisworks model, we need to configure a DataTools within Navisworks. We will then be configuring the database connection. When working with the DataTools in Navisworks, there are a few very important rules to keep in mind. If you are using a 32-bit workstation, then you need to utilize the 32-bit ODBC drivers. 64-bit workstations need to utilize 64-bit ODBC drivers. It is also important to note, that the link to Navisworks is one way. Data can be linked and viewed inside of Navisworks, but the data can’t be updated within Navisworks.
My workstations are all Windows 10 64-bit workstations. My PC’s are using Microsoft Office 365. My Mac running Windows 10 64-bit on parallels using Office 365. The MS Access 2013 runtime drivers can be downloaded here: https://www.microsoft.com/en-us/download/confirmation.aspx?id=39358 If you are using an older version of office the MS Access 2010 drivers can be downloaded from here: https://www.microsoft.com/en-us/download/details.aspx?id=13255.
Data Source
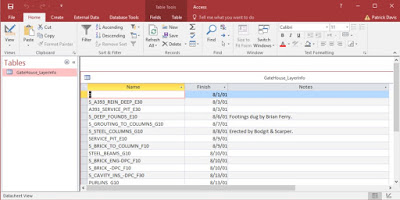
The Gatehouse project includes a sample MS Access database which is why I am using it as an example
 |
| Figure 1 – Data Source with column labels |
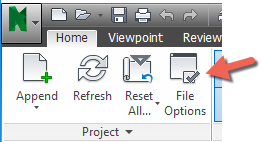
Our next step is to open Navisworks and the Navisworks model that you want to connect your external data source to. In Navisworks, on the Home tab, Project panel, click on the File Options button (Figure 2). This will open the File Options dialog.
 |
| Figure 2 – Accessing the File Options |
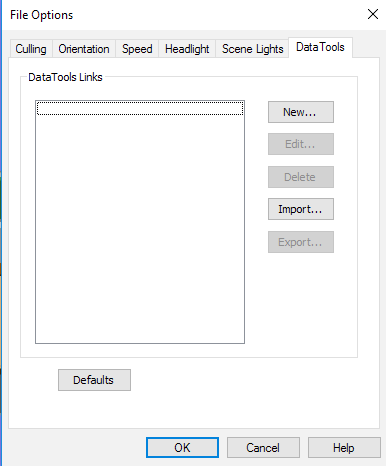
In the File Options dialog, we will start the process of configure our database connection (Figure 3). As shown in Figure 1, click the DataTools tab and then click the New button to create a new DataTools link to open the New Link dialog.
 |
| Figure 3 – File Options dialog for creating a new DataTools link |
In the New Link dialog (Figure 4), we first want to name the new link connection we are creating. For this example, I am using the name “Gate – MS Access Connection”. We then need to select the ODBC Driver Connection …


Leave a Comment
You must be logged in to post a comment.