The first article in this series got us through the potentially confusing steps of selecting items in our Navisworks file based on Revit criteria. Now that we have our items selected (either from the Set we made or just because we have them selected) we are ready to move on to the next step; selecting the data to export and exporting it.
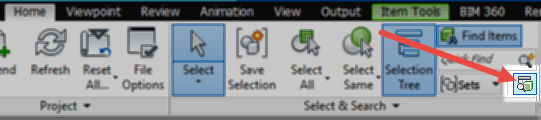
Confirming that you have the correct items selected in your Selection Tree, we need to now open up the Selection Inspector. You can right-click on a selected item in the Selection Tree and click “Selection Inspector…” or go to the Home tab and click the little button for it on the Select & Search panel.
Opening the Selection Inspector shows me a preview list of the data I am going to export. By default, Navisworks lists out the Item Name and the Item Type. That’s good information to have, but to be able to correctly export data and attach it to specific individual items, I need a piece of information that is…