In this Autodesk Revit tutorial we are going to take a look at Symbols. If you’d like to watch the video version of this tutorial first, simply click in the box below….
[youtube https://www.youtube.com/watch?v=FR355TLCn_I?feature=oembed&w=720&h=405]
Revit Symbols allow you to “stamp” your views with standard annotations. The symbols are “actual” size as printed out. For example if you created a rectangular symbol that was 50mm high, then it would actually measure 50mm high on paper when printed out, irrespective of the scale of the view it is on. This property makes symbols really useful for annotations such as North Points.
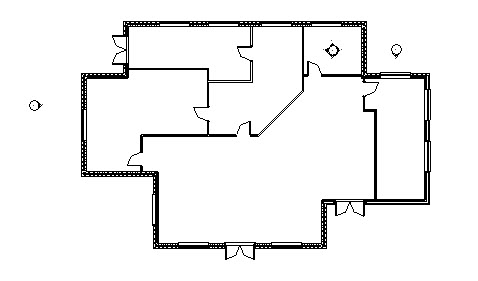
Let’s go ahead and place a North Point symbol onto this Floor Plan view….
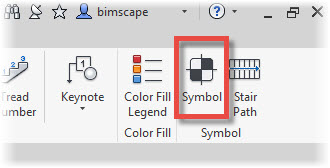
The “Symbol” tool can be found on the “Annotate” menu….
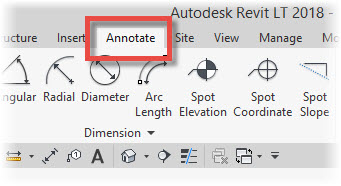
Once you are on the “Annotate” menu, go ahead and select “Symbol”…
Notice the options now available to you on the Options Bar….

You can choose to have a number of Leaders emanating from your symbol (1,…